R O water filter wiring connection
 |
R O water filter wiring connection |
Friends, today I am going to tell you about the complete wiring connection of RO water purifier. So you are requested to read the post in full and take advantage of it; you are going to learn a lot, so let's start.
Electrical items in the R O water filter
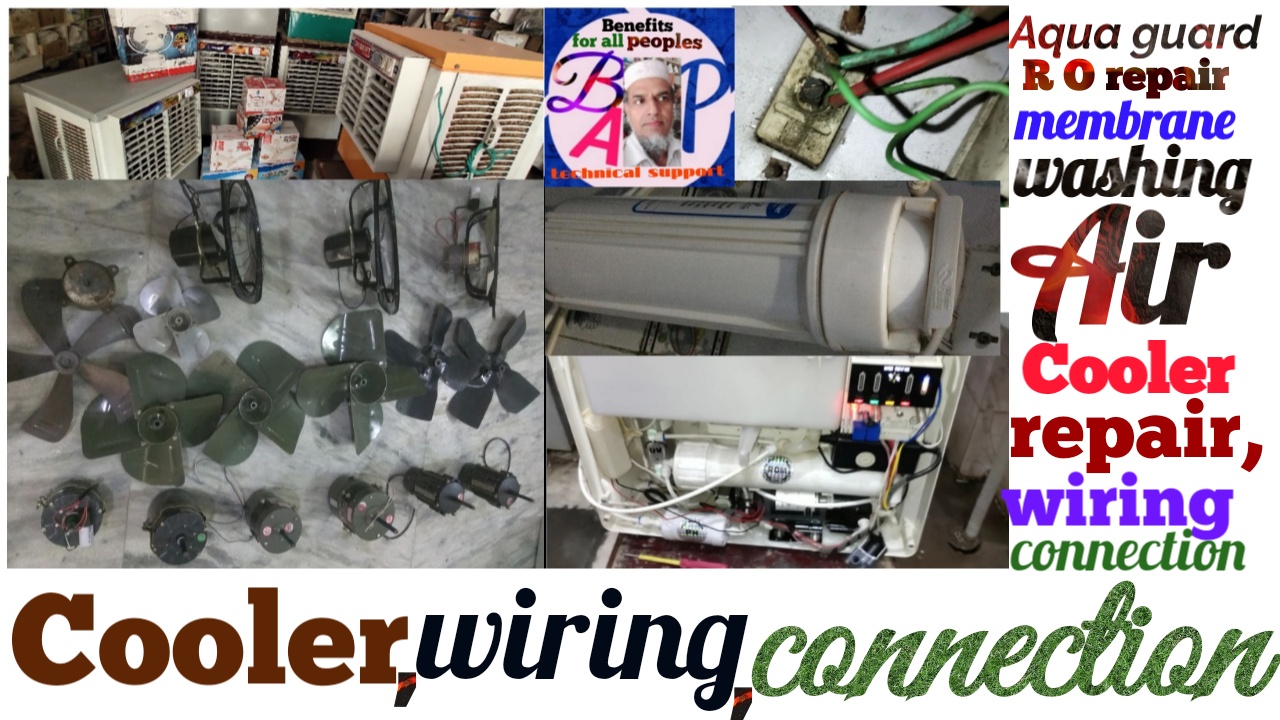
The R O Water Purifier consists of a total of seven electrical items.
1. SMPS AC - 220 volt to DC - 36,24 volt. Must
2. Booster pump 36 volt. Must
3. UV Choke 220 volt.
4. Float 220 volt. Must
5. LPS 220 volt.
6. SV Blue 24 volt. Must
7. Auto flash 24 volt.
You can identify these seven components by looking at the picture below.
4
R O water filter wiring connection
Friends, the 7 items that I told you, it is not necessary that you have seven items in each of the arrows.
In the same way as ARO, these components are more or less installed in it, at least each ARO will take four items! Without those four items, ARO will not complete!
As you see above, the number wise must have the item written in front of it, without which it must not be complete and without which it is not written. Those items may or may not be needed.
Now down. Let me tell you which items can be more
Why am I stating that four items 5,6,7,
Because there will be many of you who have RO system in their homes, then there must be four items in any RO system and some people can have five items in RO system, some people can have six items in RO system. There may be seven items in the RO system, so you do not fall into confusion.
How I have explained in this post and your RO water purifier system is in some other way, so I am going to tell you all the details that if there is any kind of components in your home RO water purifier, then you can make the wiring well To understand.
Most RO water purifiers have 5 items of wiring and 6 components.
Very few RO water purifiers have 4 components or 7 components.
Now I am going to tell you the complete wiring connection with all the seven components below. Now you have to see that if there is no component in your RO water purifier, then you will ignite that wire and you will understand the wiring of the remaining items. There is no item for his joint, you will not fall into confusion, without that you will do the rest of the wiring.
First of all we will take SMPS and see in it that on one side there will be a wire with two pin plug which will be about one and a half meter or 2 meter long and on the other side there will be two wires separated for 24 volts and 36 volts i.e. 4-wire with the ends Open, whose length will be about 6 inches, no one will be connected to the plinth, while the wire on one side will have a 2 pin plinet.
On the side where there will be a two-pin plated wire, cut that wire cable leaving 4 inches from the root of the SMPS and then open the 2-inch only black colored cover on the top of the cut wire, that is, cut the cover. Peel the wire, now the color of both the wires can be one black and one red, then the red colored wire will separate the two ends and separate the two ends of the black color wire. Now we have cut two wires with two pins, that is, the red color and black color will connect 2,2 wires and now which wires will be connected which I have told you above with the number wise wire components which is 220 volt One is LPS and one is Flot and one is Yuvi Chowk.
UV Chowk will also have 2 wires of red color and black color, one of them will connect the red wire of the wire and the red wire of the cable with a two pin plug, similarly the black color wire of the UV chowk will be connected to the black wire of the two pin plug wire. With the color wire, you will connect the third black color wire, which you cut, leaving 4 inches from the SMPAS, in these 4 inches of red color and one of the black color wire, black color wire, these two bl Connecting with a color means that all the three black color wires will be connected together. A black wire of only UV's Yuvi Chowk's black color wire with two pin plugs and a 4 inch black color wire cut from SMPS. This 3 -wire will connect together all this wire is 220 volt side. And will put tape in 3 wires. Friends, electrical tape will be applied only in all three wires of black color at the moment. If you have end wire connectors then you can also add end wire connectors to these three wires and if there is no end wire connector then apply electric tape. Friends, be aware that it is neutral and face wire. If you do not have a UV square in your Aro, then the black color wire with direct to pin plug and the black color wire has been cut from the SMPS. Connect the two as they were before, now no wires will be connected between these two black colored wires, if there is no UV square and if there is a Yuvi Chowk then then the third wire with the black color of UV Chowk is both these black colors. Will be connected with wires, black color wire will not be connected with butt LPS switch and float switch, only face wire will not be connected with neutral wire. One of the red floated wire floats of a cable with a three pin plug will be connected to any wire of the float and will be attached to any one wire with an LPS.
That is, only two wires of two pin plugs with two pin plugs will connect 3 wires. One of the two wires of the number one LPS. One of the two wires of the number two float switch. The red colored wire i.e. total 4 stars will be assembled and now you can put end wire connector in these four wires or taping it with electric tape.
Friends, all the stars that have been added so far are all 220 volt wires.
Now we have how many 220 volt wires left, one wire left with LPS and one wire left with float and one wire left 4 inch red color wire cut from SMPS.
Now friends, gather these three wires together and connect them and put an end wire connector or taping them.
This means that now when you put this two pin plug in the electric board, from there, 220 volts will be directly directed to the SMPS to come through the LPS and float switches, then the SMPS will get electricity and then the work of the SMPS will be Convert it from such 220 to DC at 36 volts and 24 volts. Now we will see that there are four stars left at the other end of the SMPS, two wires for 24 volts and two wires. 36 volts.
And now we have 6 stars with DC with two neutral and face SV and two neutral face booster pumps and two neutral face auto flasses now talking about how to connect these 6 wires to the 4 wires of SMPS. Are.
First of all, friends will take two 6 volts SMPS, one with black and one with black with red color or white colored striped wire, out of which the red colored striped wire will be interconnected with the red color wire of the booster pump. Will connect and then connect the black color wire of the booster pump to the 36 volt black color wire of the SMPS and separate end wire connectors in these wires or Will taping with lectric tape.
Now we have two wires of 24 volts of SMPS, out of these two wires black color wire of SV will connect the black color wire of SV and black color wire of autoflush, the neutral will be connected and here Will taping or install end wire connectors. Similarly, the remaining 24 volts of SMPS with one wire stripe and the remaining stars of SV and Autoflush will be connected to each of the three stars. Ekt by Will felt and wire connector or just'll tapping electric tape.
Friends, this is the complete complete wiring of our AROW, friends, how did you like this post, like it, then share it, see you, thank you for reading the post in the next post, even if you did not understand anything, comment and get an answer.
दोस्तों मेरा नाम इसरार अहमद सिद्दीक़ी है आज मैं आप लोगों को आरओ वाटर प्यूरीफायर की कंपलीट वायरिंग कनेक्शन कैसे होता है इसके बारे में बताने वाला हूं । तो आप से गुजारिश है कि पोस्ट को पूरा पढ़ें और फायदा उठाएं बहुत कुछ सीखने को मिलने वाला है तो आइए शुरू करते हैं।
Electrical items in the R O water filter
The R O Water Purifier consists of a total of seven electrical items.
1. SMPS AC - 220 volt to DC - 36,24 volt. Must
2. Booster pump 36 volt. Must
3. UV Choke 220 volt.
4. Float 220 volt. Must
5. LPS 220 volt.
6. SV Blue 24 volt. Must
7. Auto flash 24 volt.
इन सातों कंपोनेंट्स को नीचे दी गई पिक्चर में आप देखकर पहचान सकते हैं।
दोस्तों यह जो 7 आइटम्स मैंने बतलाए आपको तो कोई जरूरी नहीं है कि हर एक आरो में यह सातों आइटम लगे हुए हो।
जिस तरह का आरो होता है उसी तरह उसमें यह components कम या ज्यादा लगाए जाते हैं कम से कम हर एक आरो में चार आइटम्स जरूर लगेंगे !उन चार आइटम के बगैर आरो कंप्लीट नहीं होगा!
जैसा कि आप ऊपर देख रहे हैं नंबर वाइज जिन आइटम के सामने must लिखा हुआ है वह जरूर चाहिए उसके बगैर आरो कंप्लीट नहीं होगा और जिनके सामने must नहीं लिखा है । उन items की जरूरत पड़ भी सकती है और नहीं भी।
अब नीचे।। मैं आपको बताता हूं के कौन कौन से आइटम और भी लग सकते हैं
मैं यह सब क्यों बता रहा हूं कि चार आइटम 5,6,7,
क्योंकि आप में से कई लोग होंगे जिनके घरों में आरओ सिस्टम होगा तो किसी आरओ सिस्टम में must चार आइटम तो होंगे ही और किन्हीं लोगों के आरओ सिस्टम में पांच आइटम हो सकता है किन्हीं लोगों के आरओ सिस्टम में छह आइटम हो सकता है किन्हीं लोगों के आरओ सिस्टम में सातों आइटम्स भी हो सकते हैं तो आप लोग कन्फ्यूजन में न पड़ जाएं ।
मैंने इस पोस्ट में कैसे बतलाया है और आपके आरओ वाटर प्यूरीफायर सिस्टम में कुछ और तरीके से है तो इसलिए मैं यह सारा डिटेल्स बतला दे रहा हूं कि आपके घर के आरओ वाटर प्यूरीफायर में किसी भी तरह का कंपोनेंट्स लगा हो तो आप वायरिंग को अच्छी तरह समझ सकें।
ज्यादातर आरओ वाटर प्यूरीफायर में 5 items के वायरिंग होती है और 6 components के भी होती हैं।
बहुत कम आरओ वाटर प्यूरीफायर में 4 कंपोनेंट्स होते हैं या 7 कंपोनेंट्स होते हैं।
अब मैं नीचे आपको सातों कंपोनेंट्स के साथ कंपलीट वायरिंग कनेक्शन बताने वाला हूं अब आपने देखना है कि आपके आरओ वाटर प्यूरीफायर में अगर कोई component नहीं है तो उस वायर को आप इग्नोर करेंगे और बाकी जितने आइटम्स होंगे उनकी वायरिंग आप खुद समझ जाएंगे यानी के जो item नहीं है उसकी जॉइंट के लिए आप कंफ्यूजन में ना पड़ेंगे उसके बगैर ही आप बाकी वायरिंग कर लेंगे।
सबसे पहले हम एसएमपीएस लेंगे और उसमें देखेंगे एक तरफ टू पिन प्लग वाला वायर होगा जोकि लगभग डेढ़ मीटर या 2 मीटर लंबा होगा और दूसरी तरफ 24 वोल्ट और 36 वोल्ट के लिए दो-दो वायर अलग निकले होंगे यानी 4-wire निकले होंगे जिनका सिरा ओपन होगा जिनकी लंबाई लगभग 6 इंच होगा कोई पलग से कनेक्टेड नहीं होगा जबकि एक तरफ का सिरा के वायर में 2 पिन का पलग लगा हुआ होगा।
जिस तरफ टू पिन वाला पलग वाला वायर होगा उस वायर केबल को एसएमपीएस के जड़ से 4 इंच छोड़कर काट देंगे और फिर से उन कटे हुए तारों के ऊपर चढ़ी हुई ब्लैक कलर की केवल वाली कवर दो 2 इंच ओपन कर लेंगे यानी कवर को काट लेंगे तार को छील लेंगे अब उन दोनों तारों की कलर एक ब्लैक और एक रेड हो सकती है तो रेड कलर की वायर दोनों सिरों को अलग अलग कर लेंगे और ब्लैक कलर की वायर के दोनों सिरों को अलग अलग कर लेंगे अब जो केवल हमने काटी है टू पिन वाला उसके दोनों तारों में यानी रेड कलर वाली और ब्लैक कलर वाली में 2,2 , वायर और जुड़ेंगे अब कौन से वायर जुड़ेंगे जो मैंने ऊपर आपको नंबर वाइज वायर कंपोनेंट्स वाले बताए हैं जो कि 220 वोल्ट वाला है जिसमें एक एलपीएस है और एक फ्लॉट है और एक युवी चौक है।
यूवी चौक में भी रेड कलर और ब्लैक कलर की 2 wire होंगी उनमें से एक रेड कलर की वायर और एक टू पिन प्लग वाली केबल की रेड वायर को जोड़ लेंगे इसी तरह यूवी चौक की ब्लैक कलर वाली वायर को टू पिन प्लग वाली वायर के ब्लैक कलर की वायर के साथ तीसरी ब्लैक कलर की वायर और जोड़ेंगे जोकि एसएमपीएस् से 4 इंच छोड़कर आपने जो काटी है उसमें 4 इंच में रेड कलर और ब्लैक कलर की वायरो में से एक ब्लैक कलर की वायर इन्हीं दो ब्लैक कलर के साथ जुड़ेंगे मतलब के तीन ब्लैक कलर के सारे वायर एक साथ जुड़ेंगे एक यूवी की युवी चौक की ब्लैक कलर की तार टू पिन प्लग वाली केवल की ब्लैक कलर की तार और एसएमपीएस से कटी हुई 4 इंच की ब्लैक कलर की तार यह 3-wire एक साथ कनेक्ट कर देंगे यह सारी वायर 220 वोल्ट की तरफ वाली है । और 3 वायरों में टेप लगा देंगे दोस्तों इलेक्ट्रिकल टेप अभी फिलहाल सिर्फ इन ब्लैक कलर की तीनों वायरो में ही लगाएंगे । अगर आपके पास एंड वायर कनेक्टर हैं तो इन तीनों तारों में एंड वायर कनेक्टर भी लगा सकते हैं और अगर एंड वायर कनेक्टर नहीं है तो इलेक्ट्रिक टेप ही लगा लें ।दोस्तों ध्यान रहे कि यह न्यूट्रल और फेस वाली वायर है यह दोनों वायर सिर्फ युवी चौक के साथ ही जुड़ेंगे अगर आपके आरो में यूवी चौक नहीं है तो डायरेक्ट टू पिन प्लग वाली ब्लैक कलर की वायर और एसएमपीएस के पास से जो ब्लैक कलर की वायर काटा गया है इन दोनों को ज्यों का त्यों पहले की तरह आपस में कनेक्ट कर दीजिए अब इन दो ब्लैक कलर की तारों में कोई तार नहीं जुड़ेंगे अगर यूवी चौक नहीं है तो और अगर युवी चौक है तो फिर यूवी चौक की ब्लैक कलर वाली तीसरी तार इन दोनों ब्लैक कलर की तारों के साथ जुड़ जाएंगी, बट एलपीएस वाली स्विच और फ्लोट वाली स्विच के साथ ब्लैक कलर की वायर नहीं जुड़ेगा उसमें सिर्फ फेस वायर जुड़ेगा न्यूट्रल वायर नहीं जुड़ेगा यानी टू पिन प्लग वाली केबल की रेड कलर वाली वायर फ्लोट की एक किसी भी वायर के साथ जोड़ दिया जाएगा और एलपीएस वाली किसी भी एक वायर के साथ जोड़ दिया जाएगा।
यानी के टू पिन प्लग वाली केवल की रेड कलर वाली वायर के साथ 3 तारें जुड़ेंगे नंबर वन एलपीएस की दो तारों में से कोई भी एक तार नंबर दो फ्लोट वाली स्विच की दो तारों में से कोई सी भी एक तार नंबर 3 यूवी चौक की एक रेड कलर वाली तार यानी टोटल 4 तारे इकट्ठी जोड़ दी जाएंगी और अब इन चारों वायरों में आप एंड वायर कनेक्टर लगा लीजिए या इलेक्ट्रिक टेप से टेपिंग कर दीजिए।
दोस्तों अब तक यह जितनी तारे जोड़ी गई है यह सब 220 वोल्ट वाली तारें हैं।
 |
| LPS 220 Volt |
 |
| LPS 220 Volt |
अब हमारे पास 220 वोल्ट वाली कितनी तारें बच गई एक तार एलपीएस वाली बची है और एक तार फ्लोट वाली बची है और एक तार एसएमपीएस से काटी गई 4 इंच वाली रेड कलर की तार बची है।
अब दोस्तों इन तीनों तारों को आपस में इकट्ठी करके कनेक्ट कर दीजिए और एंड वायर कनेक्टर लगा दीजिए या टेपिंग कर दीजिए।
मतलब यह हुआ कि अब यह टू पिन वाली प्लग जब आप इलेक्ट्रिक बोर्ड में लगाएंगे तो वहां से 220 का वोल्ट एसएमपीएस में आने के लिए पहले इनडायरेक्ट होगा एलपीएस और फ्लोट वाली स्विच के थ्रू फिर एसएमपीएस को इलेक्ट्रिसिटी मिलेगा और फिर एसएमपीएस का काम यह होगा कि वह ऐसी 220 से कन्वर्ट करें डीसी 36 वोल्ट और 24 वोल्ट में अब हम देखेंगे एसएमपीएस के दूसरे सिरे में जो चार तारे बची हैं दो तार 24 वोल्ट के लिए और दो तार 36 वोल्ट के लिए।
और अब डीसी वाली 6 तारे हमारे पास बची हैं जिसमें दो न्यूट्रल और फेस की एसवी वाली और दो न्यूट्रल फेस बूस्टर पंप वाली और दो न्यूट्रल फेस ऑटो फ्लास वाली अब इन 6 वायरों को एसएमपीएस के 4 तारों में कैसे जुड़ेंगे इसके बारे में नीचे बात करते हैं।
सबसे पहले दोस्तों एसएमपीएस के 6 वोल्ट वाली दो वालों को लेंगे जिसमें एक ब्लैक होगी और एक ब्लैक के साथ रेड कलर या वाइट कलर की धारी वाली तार होगी इनमें से रेड कलर की धारी वाली तार को बूस्टर पंप के रेड कलर की तार से आपस में कनेक्ट कर देंगे और फिर बूस्टर पंप की ब्लैक कलर की तार को एसएमपीएस के 36 वोल्ट वाली ब्लैक कलर की तार से कनेक्ट कर देंगे और अलग-अलग इन तारों में एंड वायर कनेक्टर लगा लेंगे या इलेक्ट्रिक टेप से टेपिंग कर देंगे।
अब बच गई हमारे पास एसएमपीएस की 24 वोल्ट की दो तारें इन दो तारों में से ब्लैक कलर की तार को एसवी की ब्लैक कलर की तार और ऑटोफ्लश की ब्लैक कलर की तार तीनों को आपस में जोड़ देंगे यानी न्यूट्रल आपस में जुड़ जाएगा और यहां पर टेपिंग कर देंगे या एंड वायर कनेक्टर लगा देंगे इसी तरह एसएमपीएस की 24 वोल्ट की बची हुई एक तार धारी वाली और एसवी और ऑटोफ्लश की बची हुई एक एक तारे तीनों तारों को इकट्ठे आपस में कनेक्ट करके एंड वायर कनेक्टर लगा देंगे या इलेक्ट्रिक टेप से टेपिंग कर देंगे बस।
दोस्तों यह हमारे आरो की पूरी कंपलीट वायरिंग हो गई दोस्तों यह पोस्ट आपको कैसा लगा पसंद आया तो लाइक करें शेयर करें फिर मिलते हैं अगली पोस्ट में पोस्ट पढ़ने के लिए आपका धन्यवाद फिर भी अगर कुछ समझ में नहीं आया तो कमेंट करें और उत्तर पाएं।
Air cooler wiring connection,regulator wiring, vibration of air cooler, ceiling fan vibration, motorcycle maintenance, R O water purifier Pipelines connection,wiring connection Booster Pump repairing etc. iskey alawa Washing Machine ki wiring connection aur repairing, in saree cheezo ke baare mein jankariya dene wala hoon.
Please do not enter any spam link in the comment box. ConversionConversion EmoticonEmoticon